With the average American car weight increase from 2,871 pounds in 1974 to 4,094 pounds in 2022 according to Environmental Protection Agency study, the brakes, and especially the brake pads, have a really tough life. It’s no wonder then, that they would require replacement from time to time. And it’s at this point that the question of finances comes up: How much will a brake pad replacement cost?
Unfortunately, there isn’t a definitive answer to the question. There are so many factors that influence the brake pad replacement cost. For instance, the design and construction of the brake pads: A brake pad for a Ferrari 488, that is equipped with a “6 pot” caliper running on a composite brake rotor, will be a lot more expensive than one for a Chevy Spark. So before we look at the potential replacement costs we should make sure you actually do need to change the brake pads.
When Should You Change Brake Pads?
The obvious answer to this is: “When they’re worn out”. The problem is, that with no way of easily visually inspecting the brake pad, you cannot safely determine when the brake pad is worn out; and if you wait for that expensive metal-to-metal screech as the brake pad finally reaches the end of its life, you might just end up having to replace the brake rotor as well as the pads. So here are some clues to look out for that could save you money in avoiding the premature replacement of the pads, or even worse, leaving it too late and having to replace the brake rotors as well:
1. The brake-fluid “low-level” warning light comes on the dashboard
While this is actually an indication that the brake fluid is low, it implies that the brake pad material has worn down to such an extent that the fluid level in the reservoir has dropped. This in itself is not to say that the pads need to be replaced, rather a warning that you need to check the thickness of the remaining friction material.
2. The “brake pad wear” indicator warning light comes on in the dashboard
Unlike the low fluid level warning, when this light comes on the sensor embedded in the brake pad has determined that the brake pads are too thin. If your vehicle is equipped with this warning system, you need to replace the pads without delay.
3. Audible warning device makes a screeching noise
Although not very common some vehicles/brake pads are fitted with a spring-like metal device that comes into contact with the brake disc when the pads have worn down to their service limit. When you hear a high-pitched squeal coming from the brakes it is definitely time to replace the pads.
4. The friction material reaches its service limit
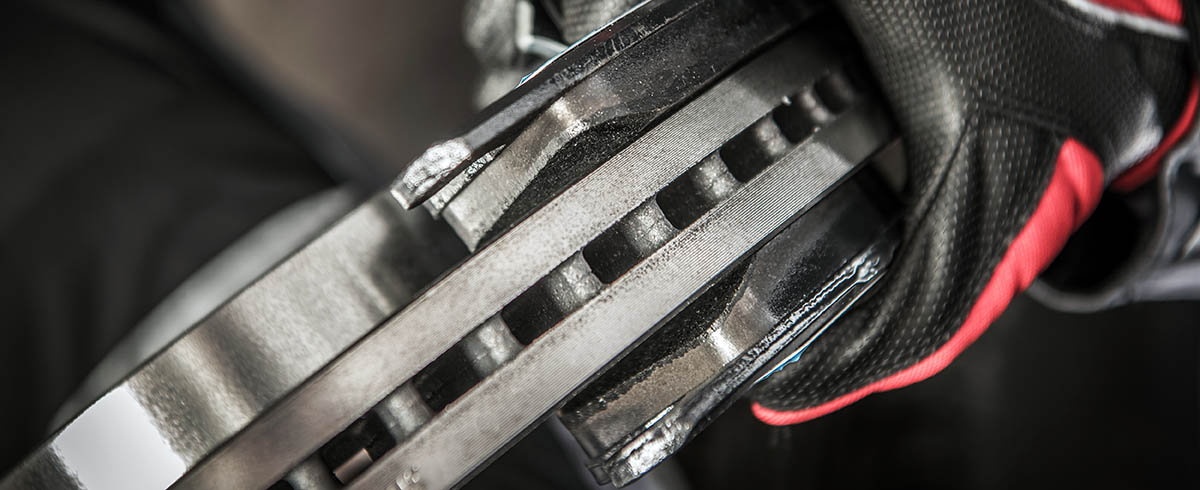
Ultimately, whether your vehicle is equipped with a warning system or not, brake pads have to be replaced when the friction material wears down to the service limit. This limit is generally accepted to be about 3mm or approximately 1/8 of an inch. On most vehicles, the inner pad (the pad that the caliper’s piston does not act on) will wear first.
Once you have determined that the brake pads really do need replacement you are one step closer to having to deal with the brake pad replacement cost. There is however one final question that you may well ask.
Can I Just Replace My Brake Pads or Do I Have to Replace the Rotors Too?
As changing the brake rotor, will significantly increase the brake pad replacement cost it is important to understand that it is not necessary to automatically replace the rotors every time you replace brake pads – only if they need changing. And brake discs should only need replacing if:
1. The brake rotor is damaged
This could be as a consequence of not replacing the brake pads in time, resulting in the rotor being scored beyond repair: Yes it is possible to ‘skim’ rotors that are lightly grooved, as long as they remain within the thickness limit.
2. The brake disc has reached its wear limit
As is the case with brake pads, rotors also wear out eventually, with every manufacturer specifying the minimum thickness of the disc. This information can be found online.
Assuming the brake rotors are still fine, it is now time to look at the brake pad replacement cost.

How Much Will a Brake Pad Replacement Cost?
While there’s no definitive answer, as with any auto repair, the cost of brake pad replacement will vary due to two main factors: cost of the parts and labor. Thus the cost can vary quite significantly: you can reasonably expect to spend in average between $100 and $300 for both front or rear brake pad replacement, depending on the price of the brake pads and whether you’re having the work carried out by a workshop or doing it yourself.
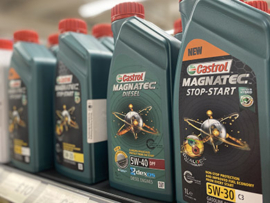
1. Brake pad parts cost
The cost of parts will usually be directly proportional to the quality, therefore saving a few dollars in this area may not be the smartest move. The price of the brake pads themselves, can range from $20 to $150 per axle. Buying unknown, cheaper brake pads (less than about $100 per axle) may save you some money at the checkout, but they will probably have a shorter lifespan, requiring more frequent replacement, or even worse, accelerate the wear and tear on the rotor. So, even if you’re having a mechanic replace the brake pads, supplying the best brake pads yourself will probably save you money.
2. Labor cost to replace the brake pads
Brake pad replacement is usually uncomplicated and carried out quite quickly, so you could probably get away with spending about $80 to $150 on labor per axle. Alternatively, you could replace the pads yourself and save money.
How to Install New Replacement Brake Pads
Even though you don’t need any special tools or training, having access to a guide makes the job a little easier. Starting with the hand tools you will need:
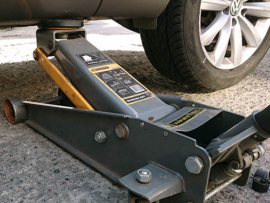
- A jack capable of safely lifting your vehicle
- Jack stands/trestles to support the car
- Wheel chocks to stop the car from moving
- A G-clamp
- Grease
- A short piece of flexible wire
- A torque wrench – this you can usually hire if you don’t have one
- You also need to ascertain the torque specification of the caliper-slide bolts – this you can find online
Important Note: Some caliper pistons may require special tools. Always consult your car’s owner manual.
Once you’ve assembled the equipment it’s time to get to work. By the way, here are you can find a more detailed guide of the brake pads replacement.
1. Removing the worn brake pads:
- Position the chocks to make sure the vehicle cannot roll away, before jacking up the vehicle so that the relevant wheels can be removed to give you access to the brake calipers.
- Using the trestles to support the car, make certain it cannot move before you start work.
- With the car raised and the necessary wheels off, remove the brake caliper – the part that holds the brake pads. This can be accomplished by undoing the bolts (usually two per caliper) that secure the caliper, allowing you to slide off the brake assembly.
- Once the caliper is free, use a piece of wire to support it somewhere in the wheel well – it’s connected to the brake line, and you don’t want the caliper hanging from this flexible hose in case you damage the rubber.
- At this point, you should inspect the brake rotor for any signs of damage or excessive wear, ridges, or grooves.
- Before removing the old pads you need to use the G-clamp to apply force to them to compress the caliper piston(s) back into the caliper housing – using the old brake pad between the caliper and clamp to protect the piston. Compressing the piston is necessary as the new pads will be thicker than the old ones you are replacing.
- Remove the brake pads from the caliper carrier.
- While you have easy access to them, apply a small amount of grease to the two caliper slide pins. Do not over-lubricate the pins otherwise the excess grease could find its way onto the pads.
Having successfully removed the worn-out pads it’s time to install the new parts.
2. Installing the new disc brake pads:
- To reduce the chances of the brakes squealing, apply a little grease to the backside of the pad that is in contact with the piston, before fitting them.
- Now fit the opposite pad.
- Next, free the caliper from the wire hanger and slide it over the pad assembly.
- Tighten the pins by hand, before using a torque wrench to tighten them to the manufacturer’s specification.
- Replace the wheels and lower the car.
- Finally, start the car and pump the brake pedal a few times until you have pressure in the system. Never move the vehicle until there is line-pressure and the brake pedal is firm.
After having installed the new brake pads you might notice some changes in the way the brakes feel and perform, especially in the first few miles after fitment.
What Should You Expect After a Brake Pad Change?
Depending on the condition of the brake rotors, it could take up to forty miles of normal driving for the brake feel to return to what it was before fitting the new pads. The reason for this is two-fold:
- Until the pads are fully bedded into the contours of the old brake rotors, they will not have a full contact area, thus the pedal may initially not be as firm as it was, and the stopping distance may increase marginally.
- It also takes a while for the pad friction material to ‘cure’. During manufacture resins and other compounds are used, and these take time to normalize.
It is also not uncommon for new pads to be noisy, either squealing or emitting a low-frequency growl under light to moderate braking. This condition may also be as a result of fitting cheaper pads that are inherently noisier – in which case you will have to get used to the noise.
Whether you do the job yourself or have the work carried out by a professional workshop, the information contained in this article will help you reduce the brake pad replacement cost, or at least give you an idea of what to expect.


We do an efforts to find, research and recommend the best products. So, we may receive commissions from purchases that you make after following the links in our product reviews.
Leave A Comment